Tuesday, 30 November 2010

Website Research.

The websites I looked at too give me ideas  on how mine should be set or laid out. and what the current styles are in fashion. These websites are also bicycle store websites which i would like to create as well.. they all have similar layouts which show that its what in fashion or what the marketed customers would be used too


http://www.evanscycles.com/
http://www.cyclestore.co.uk/
http://www.bonthronebikes.co.uk/

Evans cycle page : http://www.evanscycles.com/


I think the website page is a bit to cluttered. , although the images that make it look cluttered are also sales and from a business point of view draw in a customers. increasing the chance of a sale.
How ever I find the writing on the page too small on most parts, like the product list, and the main links.
the logo / company name is shown on the top left of the page, and still does not stand out very much even though its the  where logos are normally located


Cycle store web page : http://www.cyclestore.co.uk/


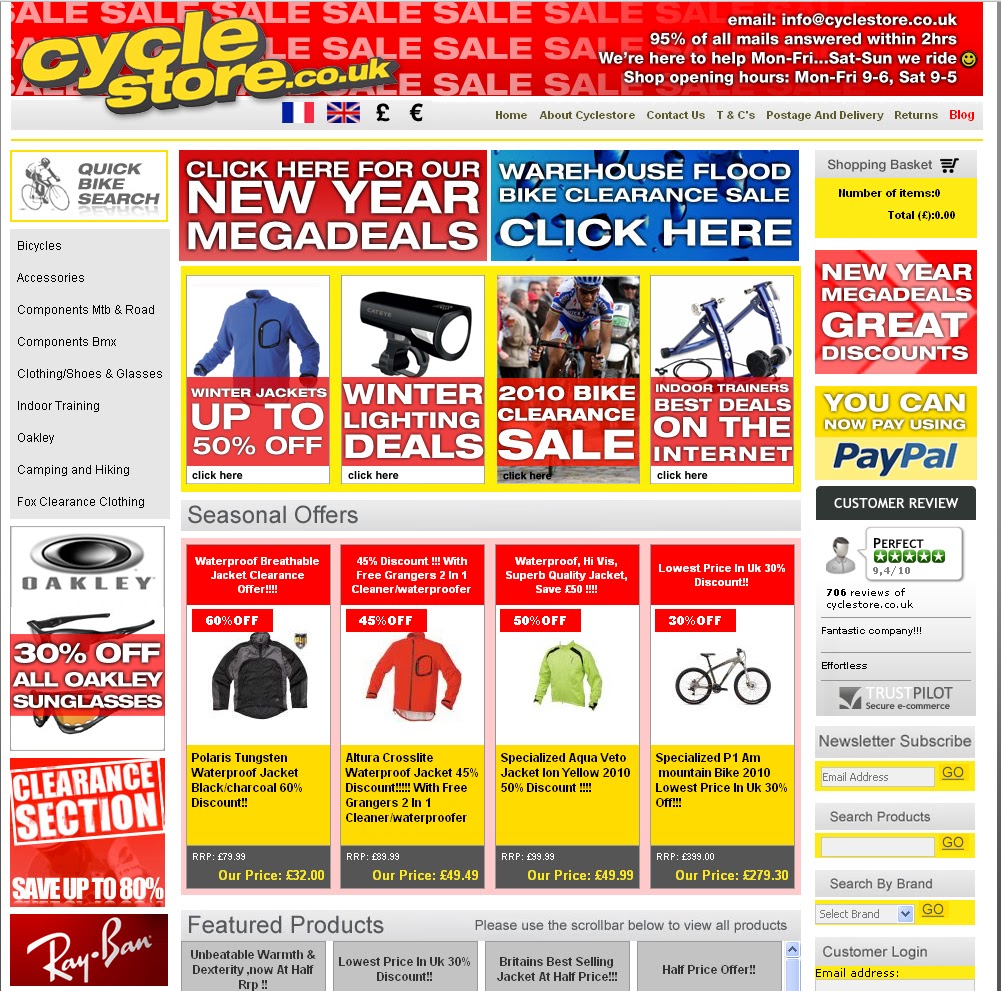
This is the middle of  both websites having   the standard things like a search bar. logo on the  top left which is the universal place for logos in my opinion . their is a category list on the side and a search bar which seems to be in most the websites i look at . their logo is very nicely placed and is more interesting because it over laps on to another part of the page.
they also advertise their sales in their very top strip having sales written all over it. although not looking as sleek as some other websites it has everything it should and more .
the colour scheme is a bit bland bus still nice .also nothing is too in your face on this website which will not deter customers.


Bonthrone bikes  page : http://www.bonthronebikes.co.uk/


This web page to me in nice, nothing to in your face force feeding you to buy something which i think that customers would like.
Also it shows products/ deals on the first page which would rise interest. the layout is fairly simple to get around and the logo is located in the usual area .
having the feature of a search bar seems fairly standard for these websites and is useful if you know what you  are looking for. it also has a small strip for adverts at the side which would be useful for bringing in a little more money or even showing off deals.
over all I like this lay out more then the rest simple but very effective i'm my opinion . also the colour scheme is attractive and visual satisfying.


These have given me things to take into consideration and  what is standard in a website. i will be referring to these websites when creating to my own . these are successful business's so their websites are well made for their customers need which is something I must take into consideration .

Wednesday, 17 November 2010

Scanning textures and Rubbing's of textures

Today we went of in groups to take rubbing's of surfaces for interesting textures and also scanned some weird and unusual things like lemons ,leafs and cabbages.

For the rubbing's I had a plastic cup, some different wall surfaces, number pads of the vending machine and photo copier and some signs. when we got back we scanned in the  graphite rubbbing's and uploaded them onto photo shop.

i found out that , finding materials to can is faster then recreating the look on photo shop. It was easy to add the effect to the words or anything.

These are the scans .

The Images would not load up


This will be useful to create a unique logo, using the textures in the background after playing around with the properties and playing with saturation. also it could be possible to use it as a textured letter fill. giving it a unique fill.
This also gave me the idea for. if i wanted a background if i had a nature shop i could just scan in leaves and make that the background of the logo or banner, not only just taking textures from scanning but also images.


For the instance like this. This was made with a cabbage leaf and changing the properties hue saturation , and a few other things and then putting text on top creating an example of what it could be like

Dslr photography introduction

Today we all had an introduction to Dslr's

DSLR - Digital Single Lens Reflex

We learnt the proper way of holding that camera

How aperture effects the depth of field , which will blur the back ground and focus on something near or focus on everything in front  capturing the mountains and hills ect.


  • Portrait images should be taken in a low aperture focus, while a scenery image should be taken with a high  one.

We also learned about shutter speed which allowed you to capture moving images or motion.

  • Slower shutter speeds allowed you to capture fast moving  images creating a blur  as it moves.
  • A faster shutter speed would be used to get the a fast moving image like a water drop.

 This will come in useful seeing as this is my chosen capture method the ability to be able to use a Dslr will let me take good quality pictures and capture it in the ways i wish to, if its movement static or anything else.
also i will see if i can combine this with panoramic and see if i can take a 360 degree image of a bike.

Tuesday, 16 November 2010

360 degree panoramic.

Taking out a tri pod , and set it up out side we took 12 pictures moving the camera . of builds and surrounds around the college.
We also took images of a room going horizontal.
These are the images that where stitched together using the arcsoft panorama maker software which was easy to use, opening the pictures you want clicking next in the bottom right  or choosing how you want the image in the bottom left


This is the end image  when all, of it was put together 


I think this could be useful for  maybe an in-store shot of stokes giving it a unique view, but it might be possible to make a 360 degree  in view image of something  showing all the sides of a bike although im not sure this has given me the idea to do this.

Monday, 15 November 2010

Panoramic images.

Made from these images. 


This is what the results where when the images where put together. 


Tuesday, 9 November 2010

Photo merge images


these photo's where used with photo merge  in photo  which would create a pan look . 


Please Click these links to see what the final image's shall look like.

Snooker Ball

This was my attempt at  creating the snooker ball which we where shown .


This is my attempt  at making it.
Firstly I made a gradient in the back ground
Then I made a new layer and used the brush tool to create a circle of colour , changing the size of the brush depending on how big I wanted it to be.
After positioning the circle where I wanted it, I selected the blending options and  made and inner and outer glow of white.
I went over the highlighting and darkened the areas with the burn and Dodge , which made it look like the light is hitting an area or casting a shadow.
i went back to the gradient area and made a shadow under the ball.
A new later was made  and a smaller white circle was made with the brush , i used text and added a 7 and added a burn effect to the side of it.